User Guide
A complete walkthrough of AnnoBio, from your first project to optimizing a prompt across a full dataset.
1. Overview
AnnoBio is a canvas for building, running, and improving LLM prompts against real datasets. You write a prompt once, connect it to a dataset, run it across every row, and, if the output isn't good enough yet, let an automatic optimizer rewrite the prompt for you based on what went wrong.
It's built for the kind of work that shows up in chemistry and medical research: pulling structured facts out of literature, screening compound descriptions, classifying trial text, anything where you'd otherwise be copy-pasting the same instructions into a chat window hundreds of times.
What this guide covers
- The core objects (project, prompt, dataset, run, review) and how they fit together
- Creating a project and adding your first prompt and dataset
- Connecting nodes on the canvas and running a prompt across a dataset
- Scoring results and letting an optimizer rewrite the prompt automatically
- Running plain Python over a dataset when a step doesn't need a model at all
- Adding your own LLM credentials, and using the Agent Assistant to drive the canvas in plain language
2. Key concepts
Project
A project is the unit everything else lives in: its own canvas, with its own prompts, datasets, runs, and review history. Switching projects switches the whole canvas.
Prompt
A prompt is a reusable instruction template made of one or more named sections, plus an output schema describing the fields you want the model to return. You write it once and run it against as many dataset rows as you like.
Dataset
A dataset is a table of rows, each one an input to run the prompt against. Build one by hand, import a spreadsheet, or pull rows directly from PubMed, ClinicalTrials.gov, bioRxiv/medRxiv, or ChEMBL.
Run
A Run node sends the prompt, filled in with each dataset row, to your chosen model, and collects the results into a table, one row of output per row of input.
Review / Score
A Score node grades a run's output against criteria you define. Once rows are scored, an optimization method can use that signal to rewrite the prompt and try again.
Process
A Process node runs your own Python function over a dataset instead of a model. No LLM involved. Useful for the parts of a pipeline that are plain data manipulation, not something worth spending a model call on.
Credential
A credential is an API key for a model provider. You bring your own; AnnoBio doesn't meter or bill LLM usage on your behalf.
3. Where to go
Use this table as a map: each row points to the guide section that covers it.
| I want to… | Go to |
|---|---|
| Start a new piece of work | Create a project |
| Add an OpenAI / Anthropic / Gemini / other API key | Add your model |
| Write reusable instructions for the model | Write a prompt |
| Bring in rows to run the prompt against | Build a dataset |
| Actually run the prompt and see output | Connect nodes and run |
| Grade output and improve the prompt automatically | Review and optimize a prompt |
| Run plain Python instead of a model call | Transform data with Python |
| Build the canvas by describing it in plain language | Ask the Agent Assistant |
| Copy or combine projects | Managing projects |
4. Create a project
Click the project name in the top bar to open the project picker.
- Click New project, or pick an existing one from the list to reopen it.
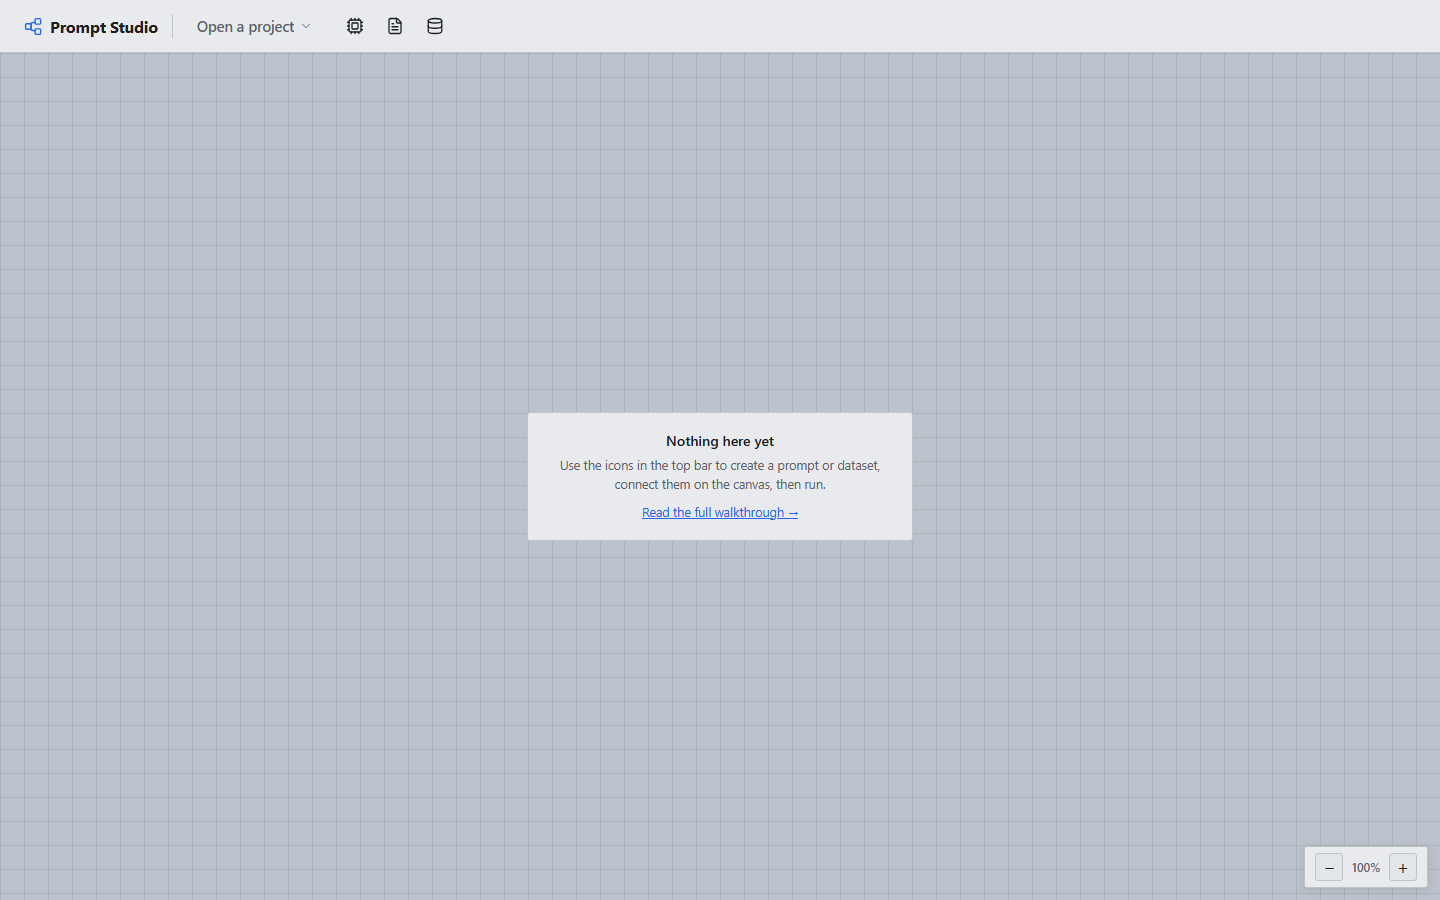
- A new project opens on an empty canvas with a short guidance box until you add your first node.
Everything you build afterward (prompts, datasets, runs, review history) is saved inside that project and reopens exactly as you left it.
5. Add your model
Before writing a prompt, open LLM settings (the chip icon in the top bar) and add a credential: Run, Review, and the Agent Assistant all need one to actually talk to a model. AnnoBio doesn't restrict which LLM you use, and doesn't meter or bill usage on your behalf; you bring your own API key, and it talks to that provider directly. There are two ways to add one:
- Via LiteLLM (the default): type a Model ID in LiteLLM's naming convention,
e.g.
gpt-5,anthropic/claude-sonnet-4-6, orgemini/gemini-2.0-flash, paste that provider's API key, and you're done. LiteLLM alone covers well over a hundred providers this way. Point the optional Base URL field at a local or self-hosted endpoint (e.g. Ollama athttp://localhost:11434/v1) to use a model that isn't hosted by anyone else at all. - Via OpenRouter: click Connect to sign in with an OpenRouter account, then pick any model from its catalog. One connection, no per-model key pasting.
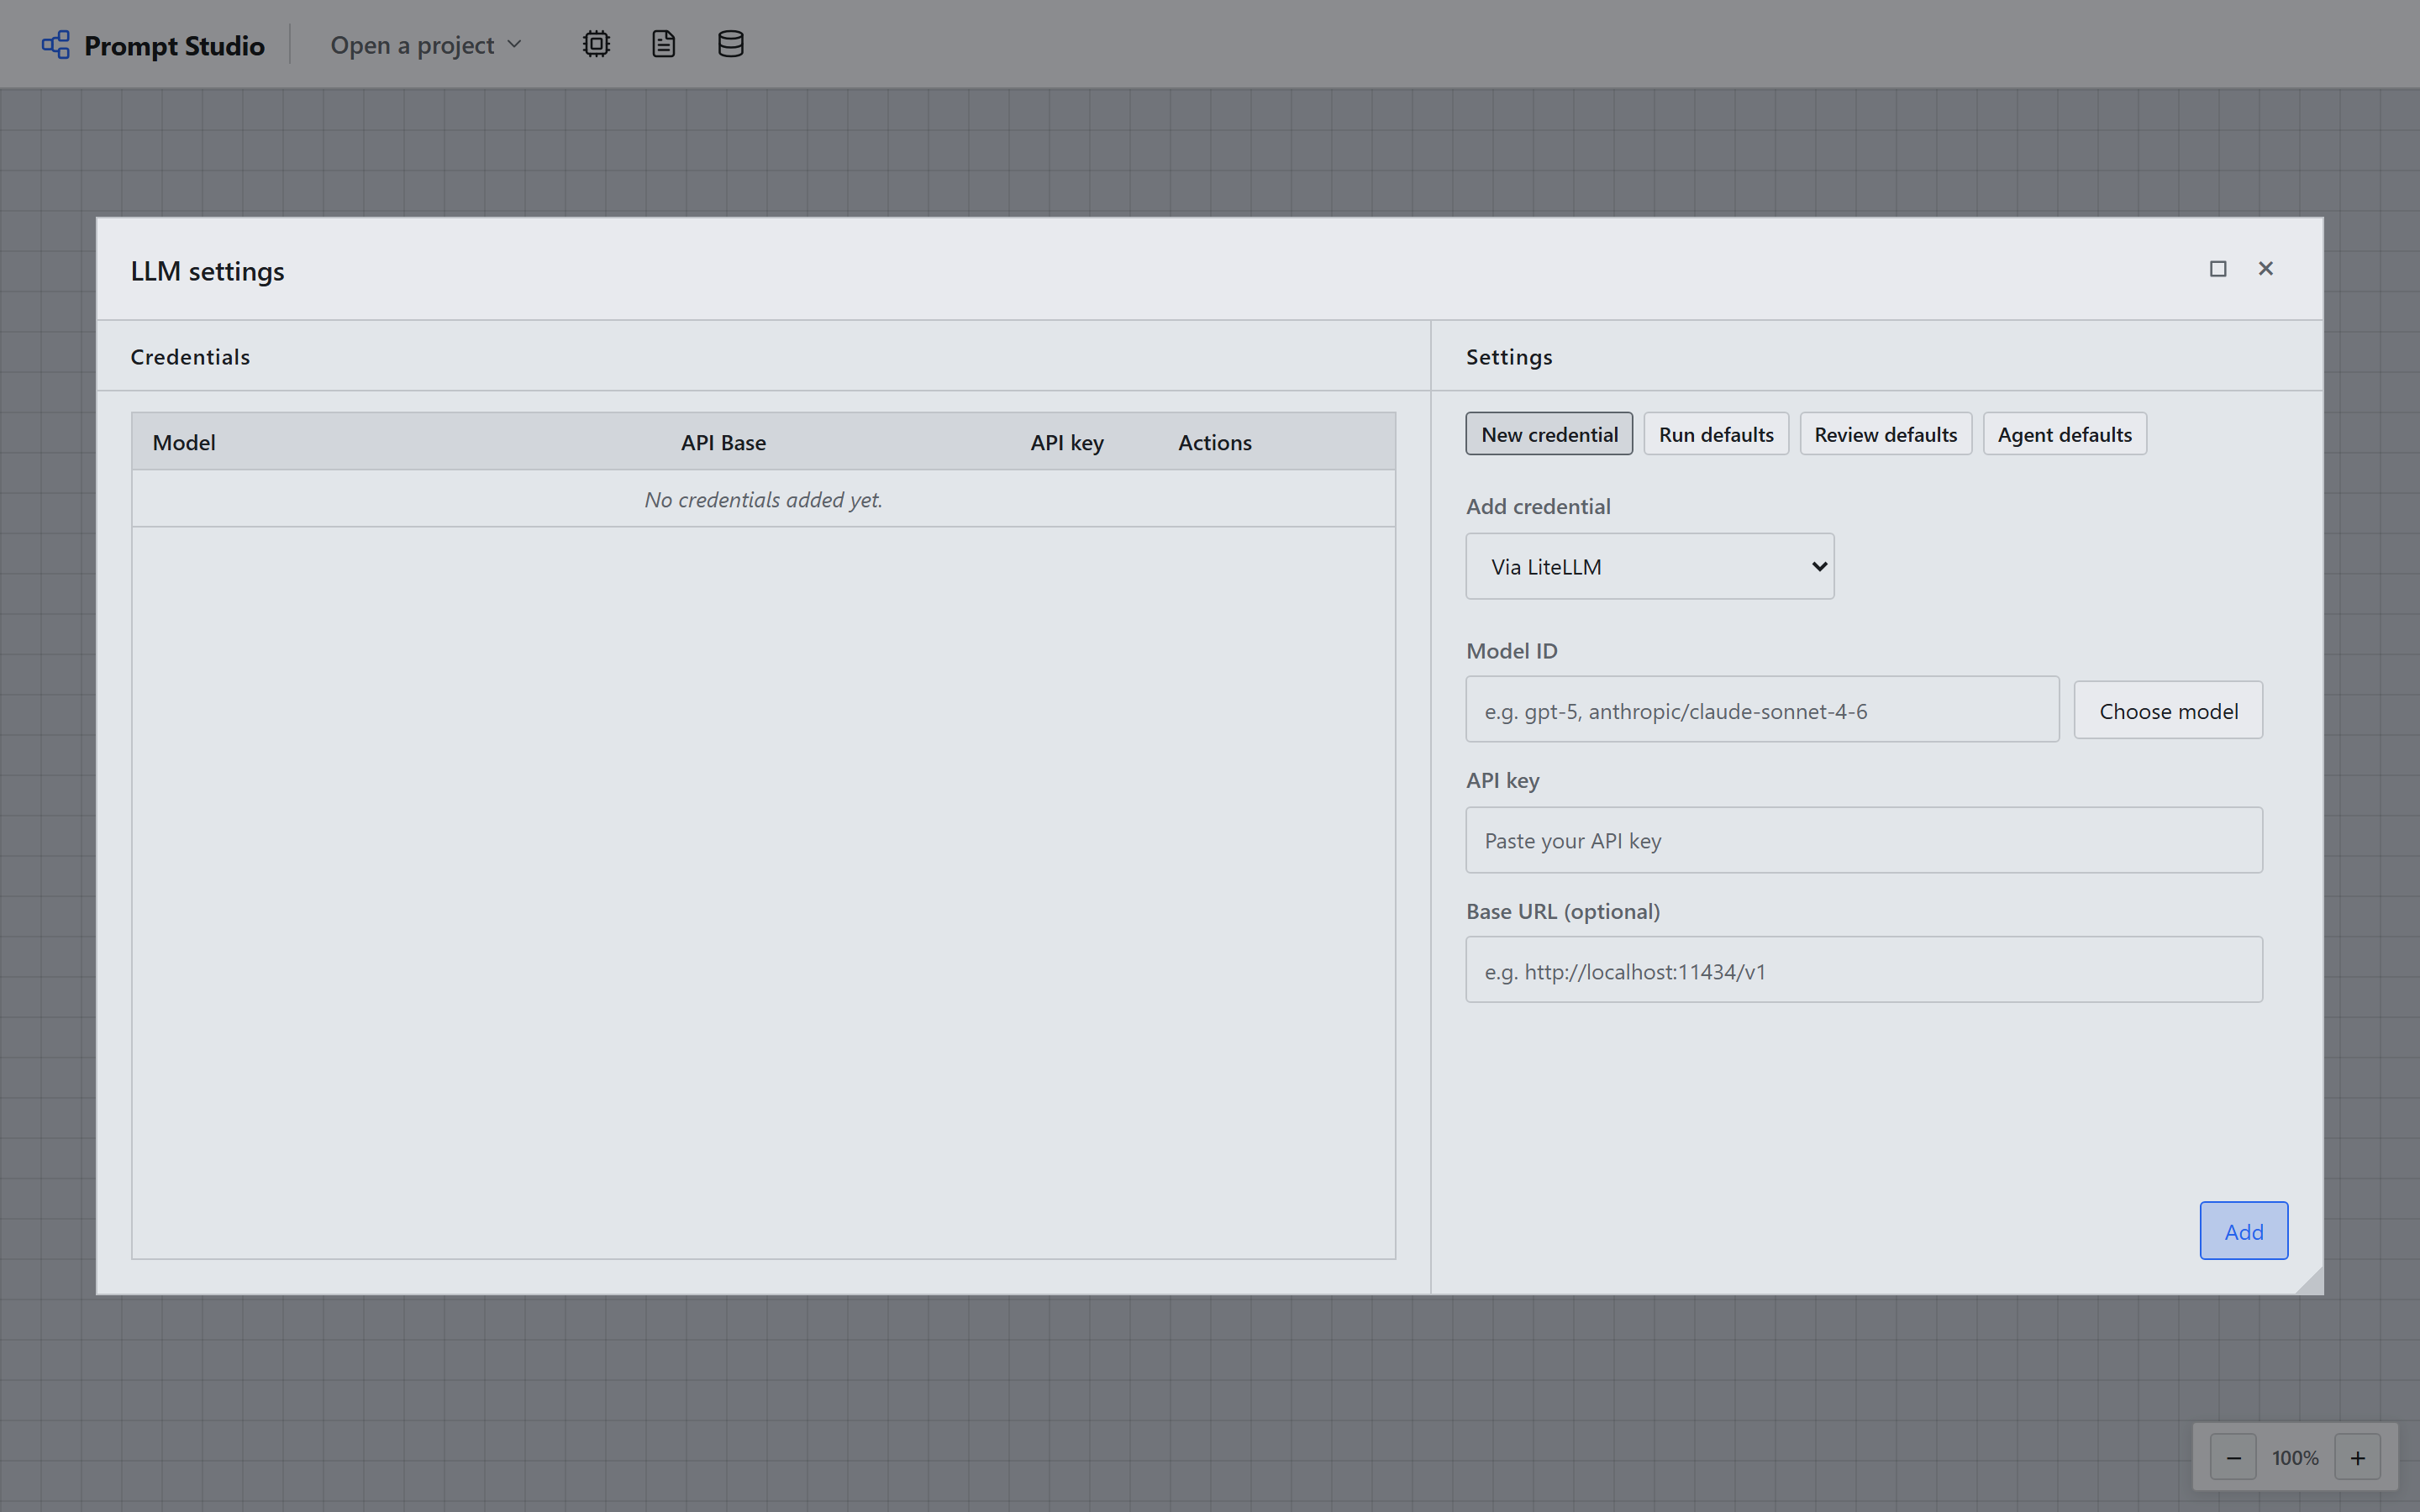
You can add more than one credential and set a different default for Run, Review, and the Agent Assistant independently, for example a cheaper model for everyday runs and a stronger one for optimization.
6. Write a prompt
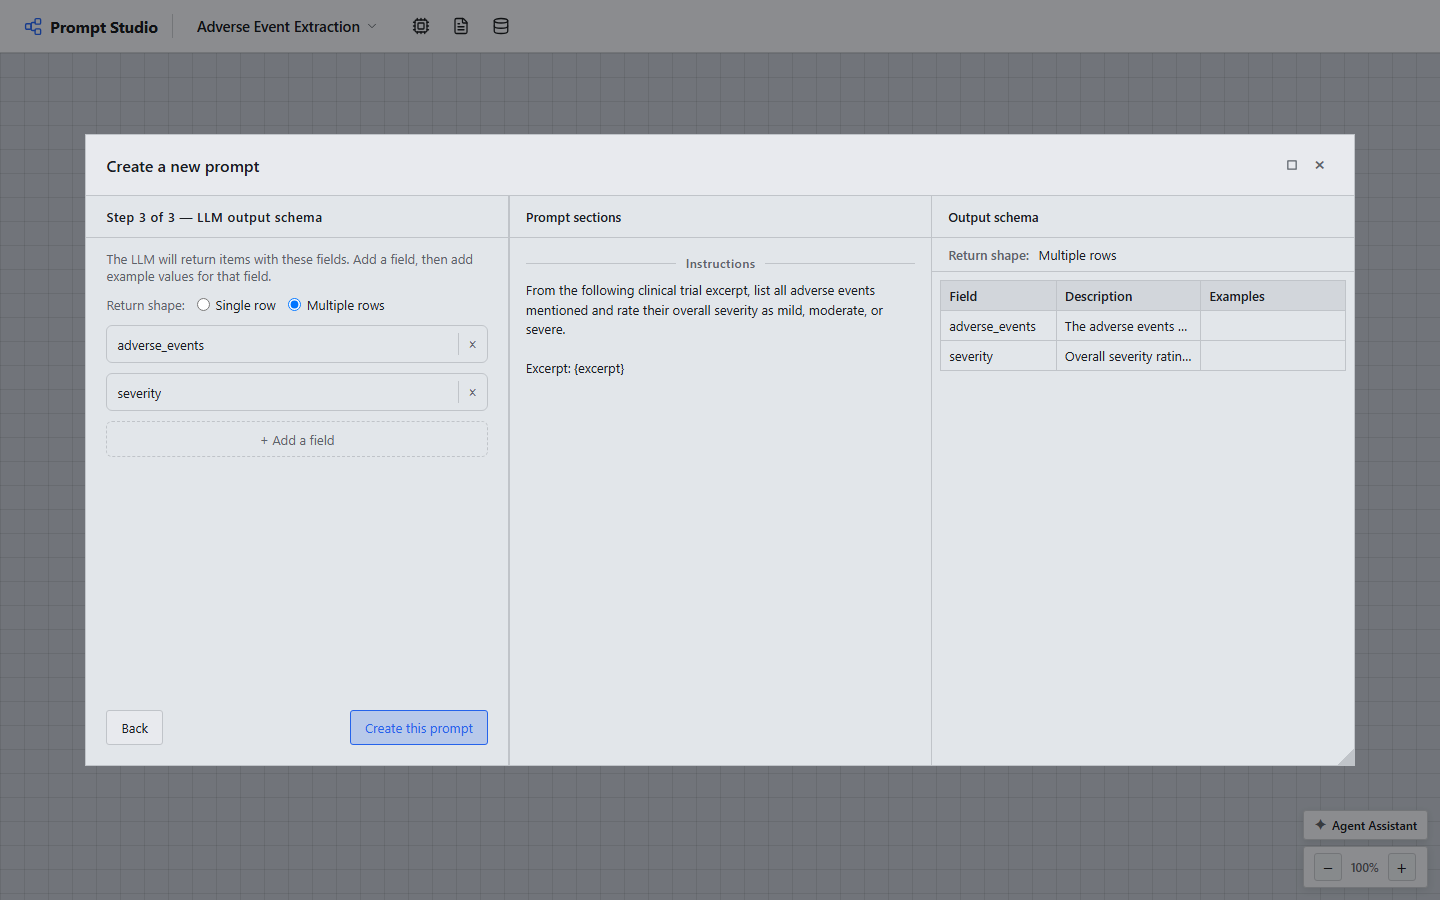
Click the document icon in the top bar to create a new prompt. The editor walks through three steps.
1. Name & description
A name and a short note on what the prompt is for. Purely for your own reference.
2. Sections
The prompt body, split into named sections. Add as many as you need and reorder them freely.
Write a placeholder in single curly braces, e.g. {excerpt}, anywhere you want a dataset column's
value inserted; you'll map each placeholder to an actual column when you set up the Run node (see
Connect nodes and run).
3. Output schema
Define the fields you want back from the model, each with a name, an optional description, and example values, plus whether the model should return a single row or multiple rows per input. This is what turns a free-text model response into a structured results table instead of a wall of text you'd have to parse yourself. A live preview on the right shows exactly how the schema and the filled-in prompt will look.
7. Build a dataset
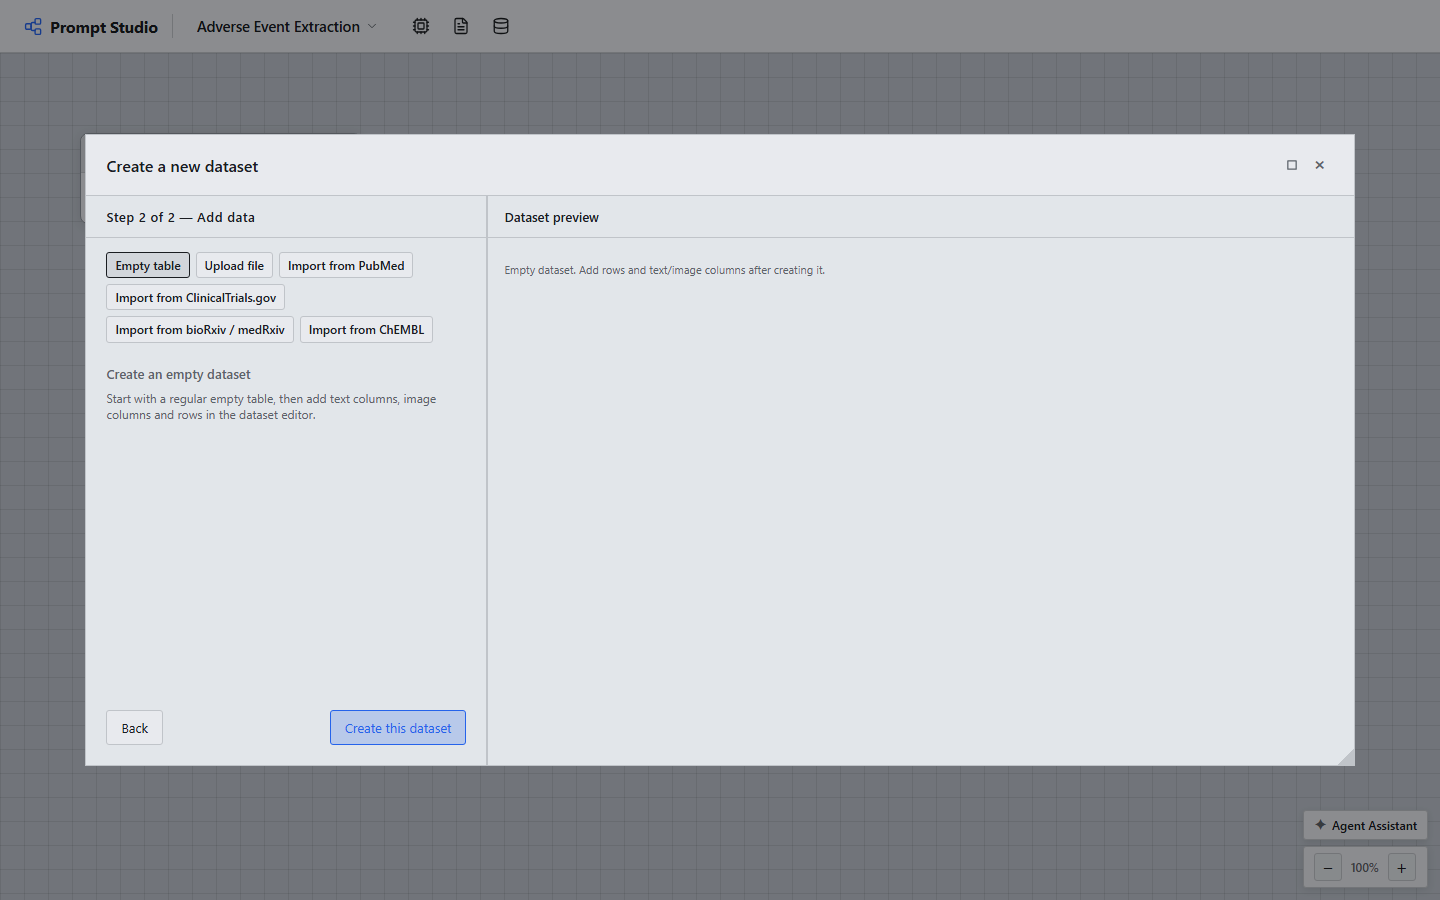
Click the database icon in the top bar to create a new dataset. Choose one of six ways to fill it in:
| Source | Use it when… |
|---|---|
| Empty table | You want to type in a handful of rows by hand. |
| Upload file | You already have a CSV, TSV, or Excel file. |
| PubMed | You have a list of PMIDs and want their abstracts as rows. |
| ClinicalTrials.gov | You have NCT numbers and want trial records as rows. |
| bioRxiv / medRxiv | You have preprint DOIs and want their abstracts as rows. |
| ChEMBL | You have ChEMBL IDs and want compound records as rows. |
Picking Empty table and clicking Create gives you a dataset node with one blank column. Double-click it to open the dataset editor, where you rename columns, add more, and type in rows. However a dataset is built, the result is the same: a table of rows and columns you can feed into a Run node.
8. Connect nodes and run
Drag a connection from your prompt node to a Run node on the canvas.
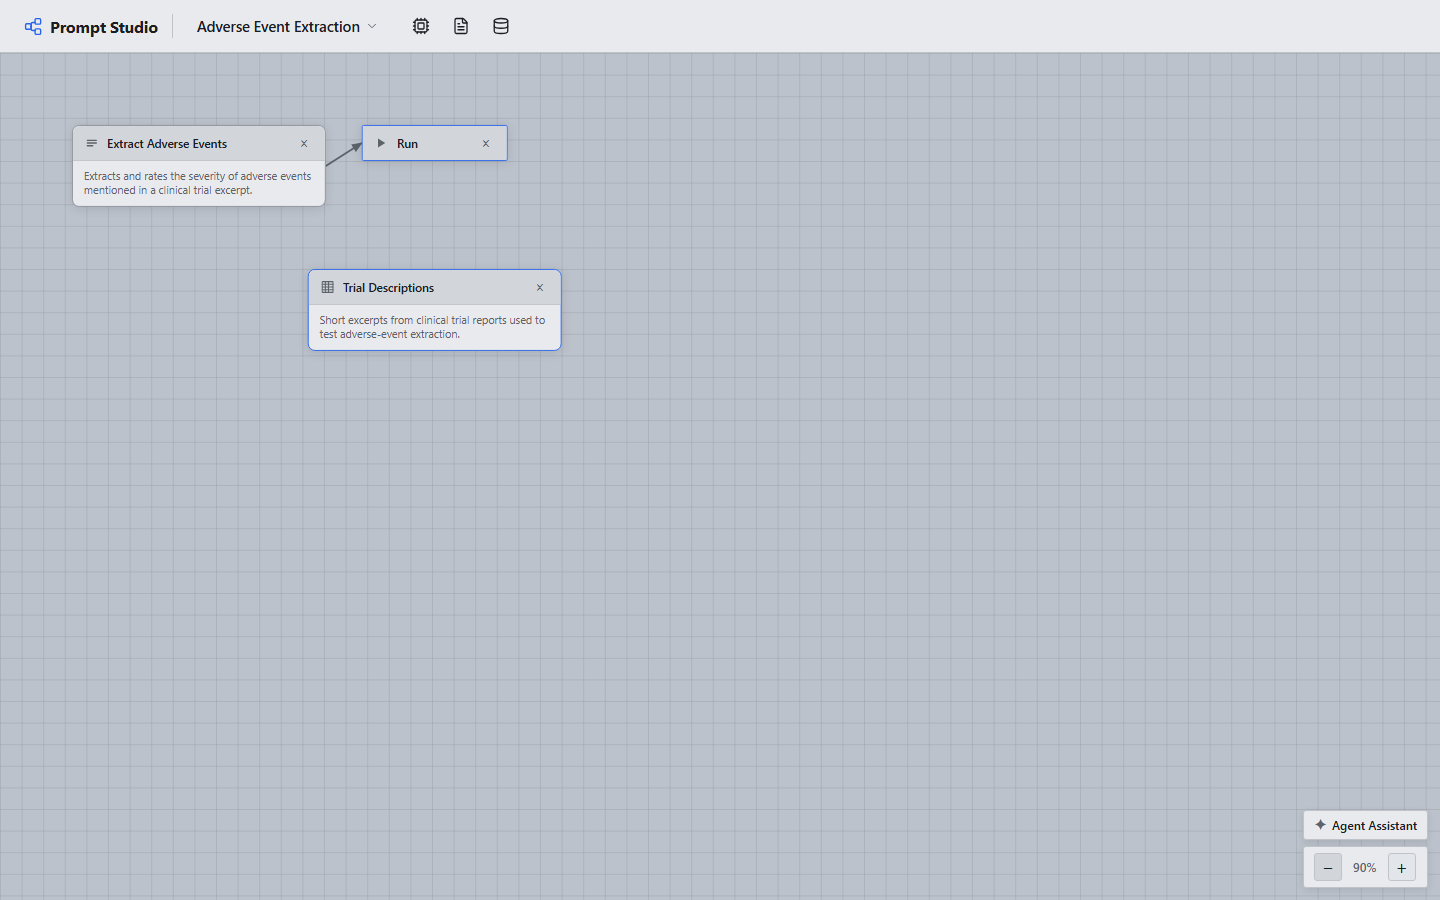
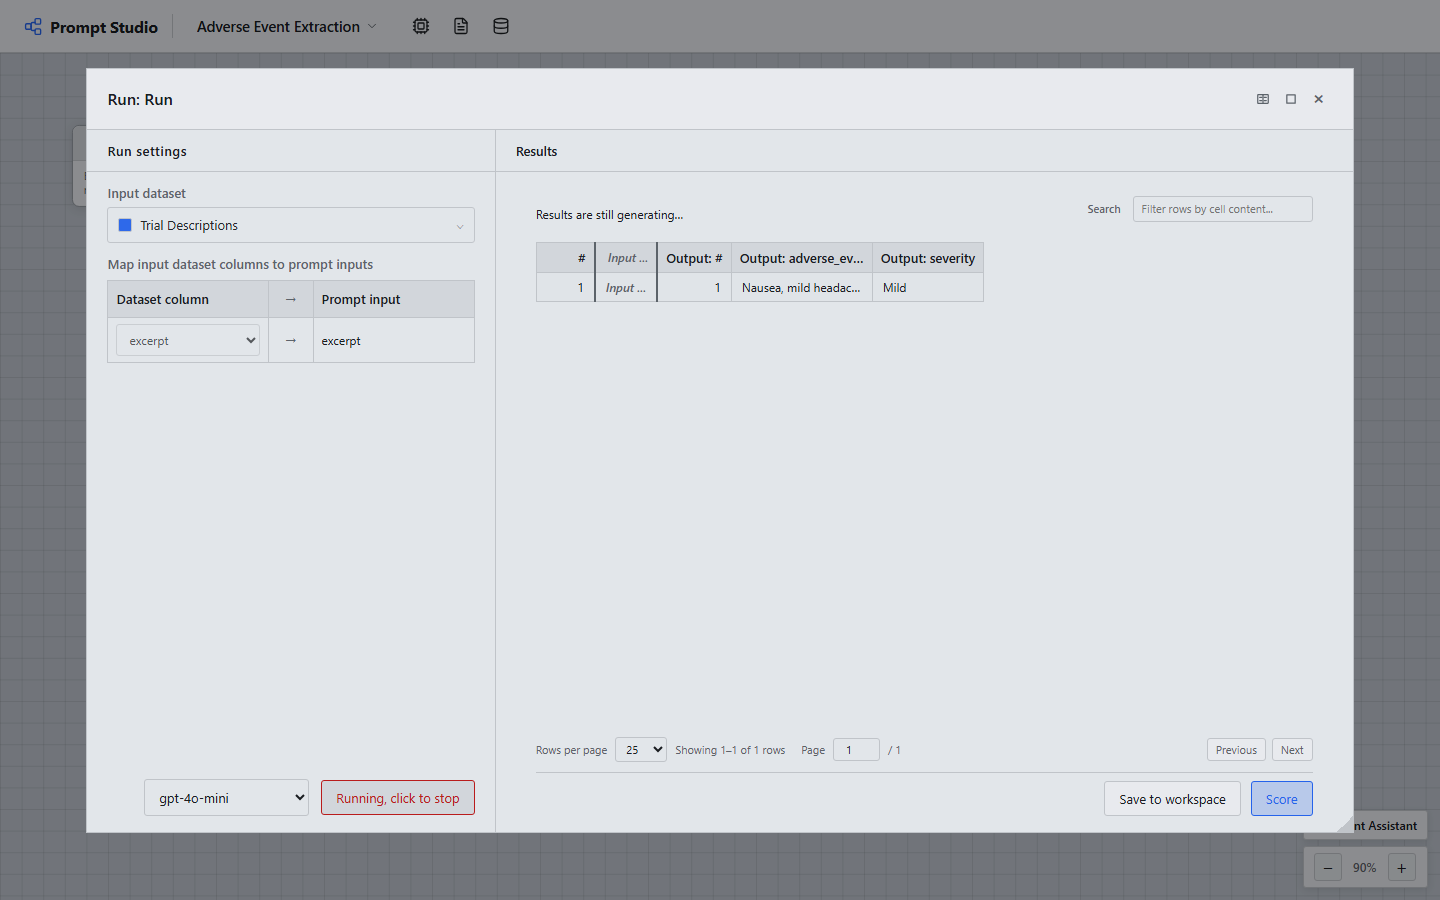
Open the Run node. Under Input dataset, pick the dataset to run against, then use the
Map input dataset columns to prompt inputs table to match each {placeholder} from
your prompt's sections to an actual column. AnnoBio suggests a match automatically when the names line up.
Pick a model at the bottom and click Run.
AnnoBio sends the filled-in prompt to your model once per row, in parallel up to your configured concurrency, and streams results back into a table as they complete.
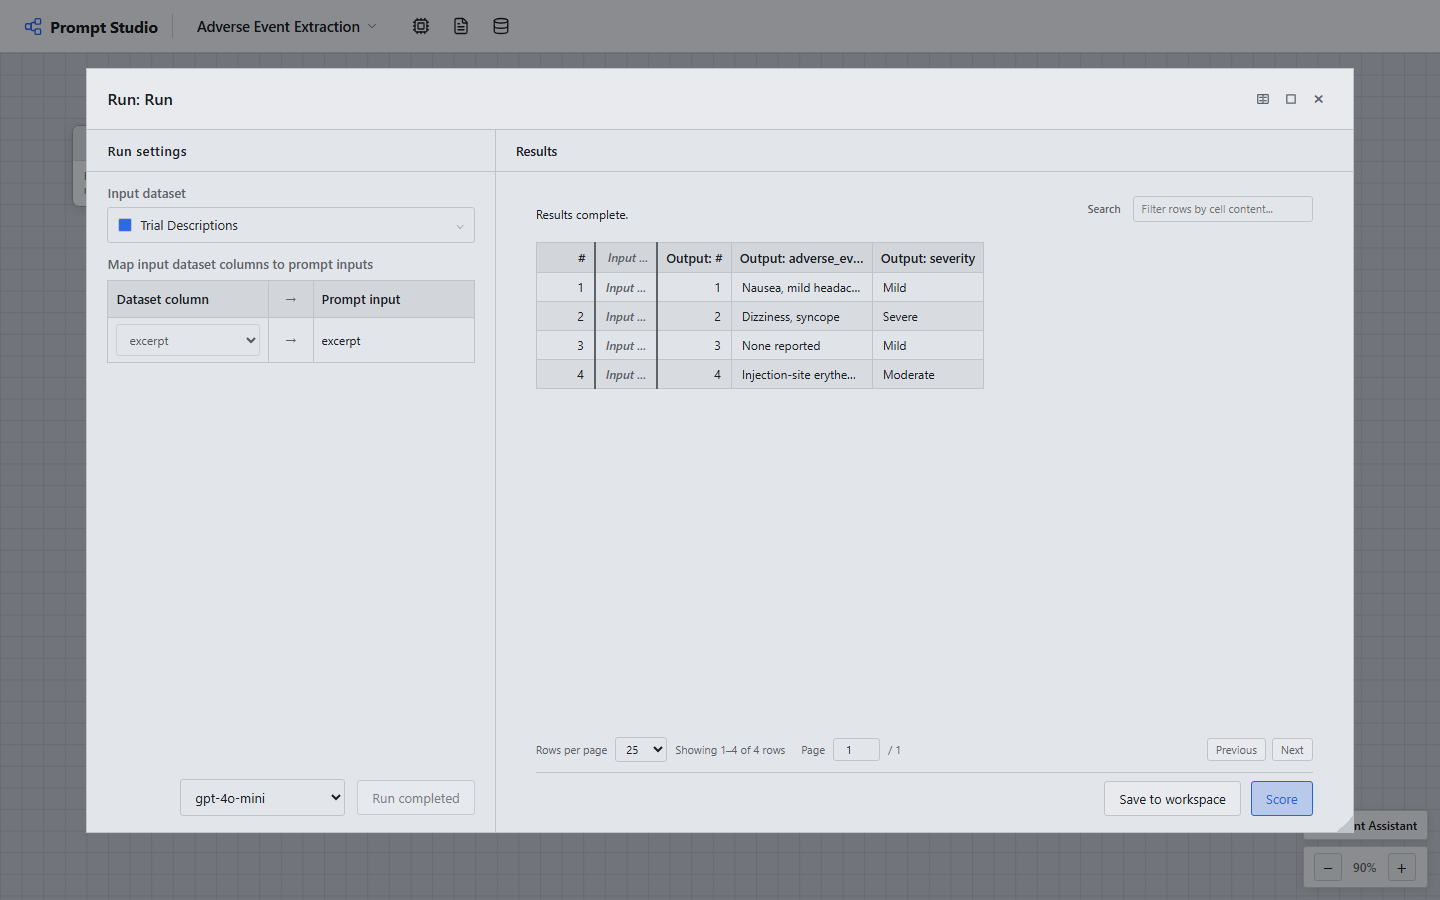
Click any result row to see the exact prompt that was sent and the model's raw response, useful when a row's output looks wrong and you want to know why.
9. Review and optimize a prompt
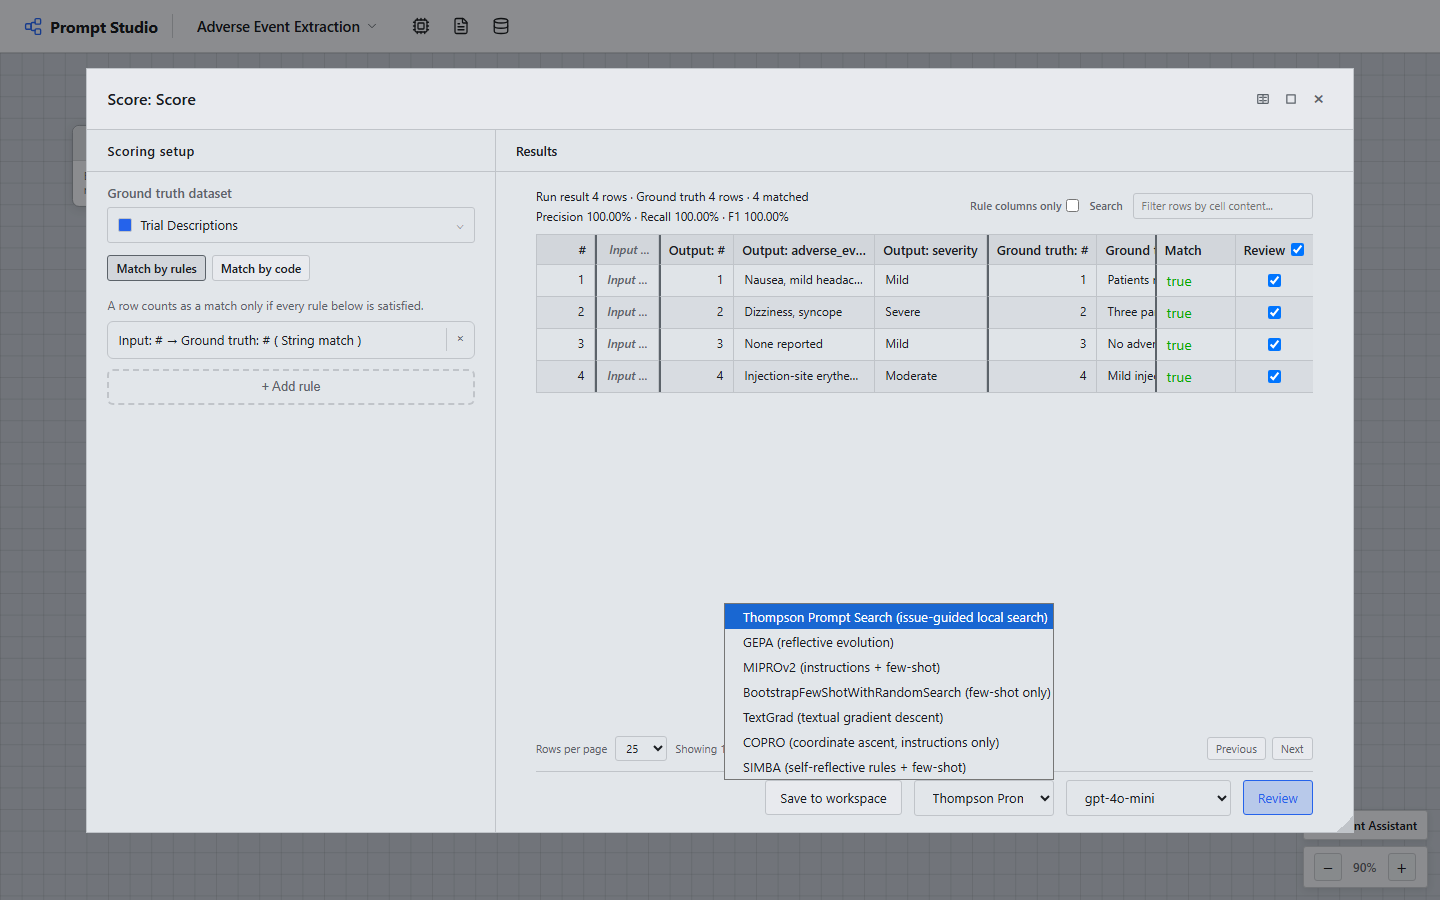
Attach a Score node to a finished run. Pick a ground truth dataset (rows with the answer you expect) and add one or more matching rules (for example, "Input # equals Ground truth #"). A row counts as a match only when every rule is satisfied; AnnoBio computes precision, recall, and F1 across the whole run automatically. Simple comparisons like this don't need code; switch to Match by code instead if matching needs logic a rule can't express (fuzzy matching, numeric tolerance, and so on).
Once rows are scored, the review-method dropdown becomes available. Pick a method and click Review to let it rewrite the prompt based on where it's going wrong.
| Method | Rewrites | Good for |
|---|---|---|
| Thompson Prompt Search (default) | Instructions | A quick first pass that reads the failing rows, explains the likely issue, and proposes a targeted edit. |
| GEPA | Instructions | Harder tasks where a single edit isn't enough. Evolves several candidate prompts over multiple rounds and keeps the best. |
| MIPROv2 | Instructions + few-shot examples | When both the wording and a couple of worked examples would help. |
| COPRO | Instructions only | Similar to MIPROv2 but skips few-shot examples, useful when example rows would eat too much of the context window. |
| BootstrapFewShotWithRandomSearch | Few-shot examples only | When the instructions are already good and the model mainly needs to see examples of the right output. |
| SIMBA | Instructions + few-shot examples | Self-reflective: the model critiques its own mistakes and turns them into rules and examples. |
| TextGrad | Instructions | Treats the score as a loss signal and nudges the prompt's wording in the direction that would have improved it. |
Not sure which to pick: start with the default (Thompson Prompt Search) for a quick pass. Reach for GEPA or MIPROv2 when a single edit isn't moving the score enough, and BootstrapFewShotWithRandomSearch when the instructions are already right but the model needs to see worked examples.
Every optimization run keeps the previous version of the prompt, so you can compare before/after and roll back if a rewrite makes things worse.
10. Transform data with Python
Not every step needs a model. Right-click a dataset node and choose Process with code to run your own Python function over it instead. No LLM, no API key, no cost, and it runs inside your own private container, not shared with anyone else.
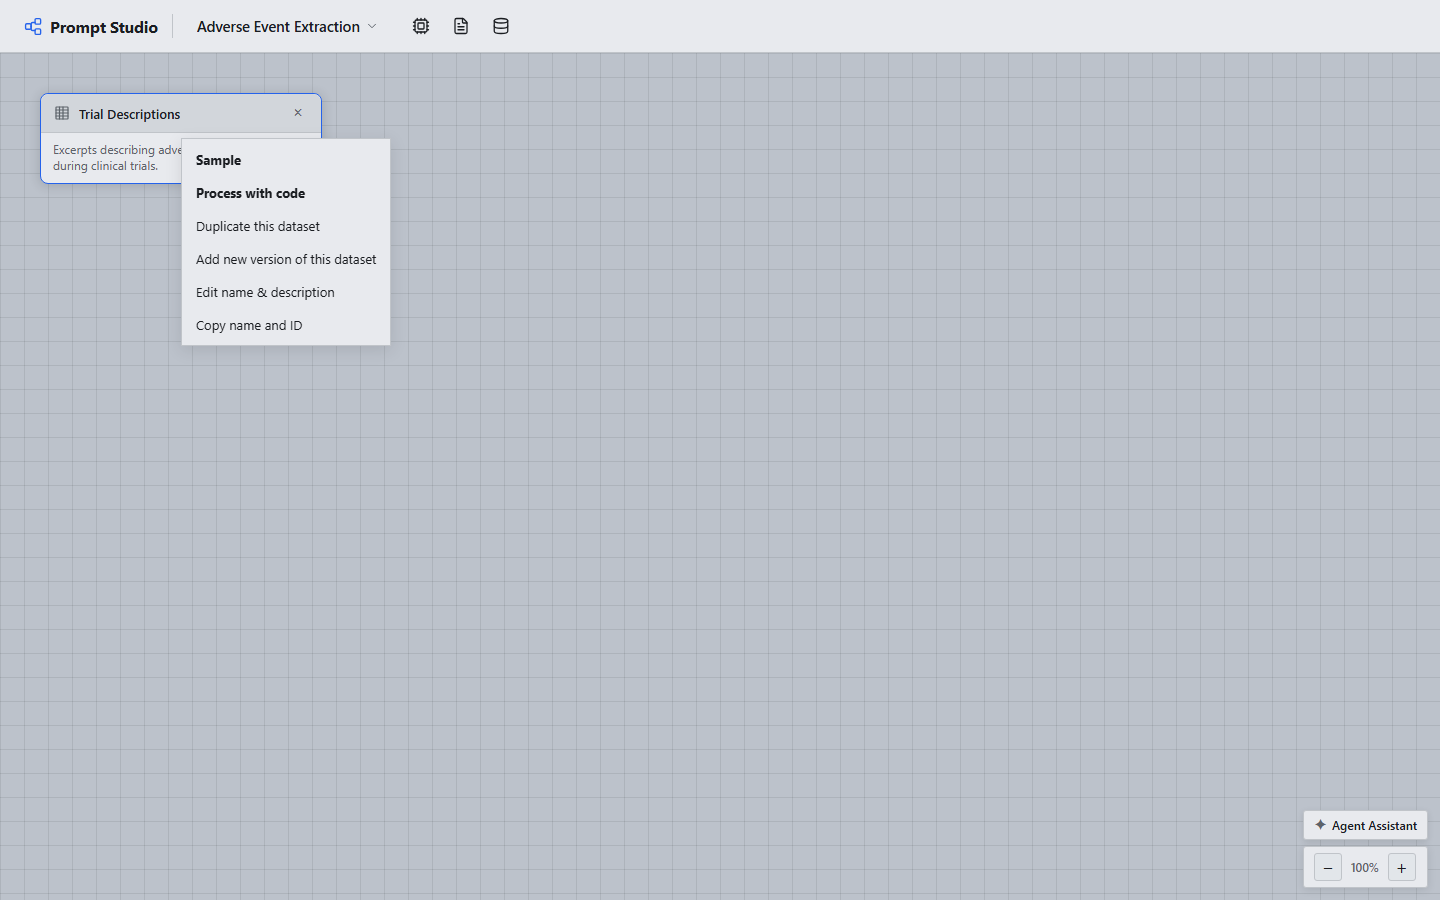
Two modes, on tabs in the Process node's editor:
- Process by row: write
def process(row):, called once per row.rowis a dict keyed by the dataset's column names; return a dict and each key becomes an output column. Good for per-row logic a prompt can't (or shouldn't) do, such as flagging keywords, computing a derived value, or validating a format. - Process as dataframe: write
def process(df):, called once on the whole dataset as a pandas DataFrame. Good for whole-table work a per-row function can't express, such as filtering, deduplication, sorting, or sampling.
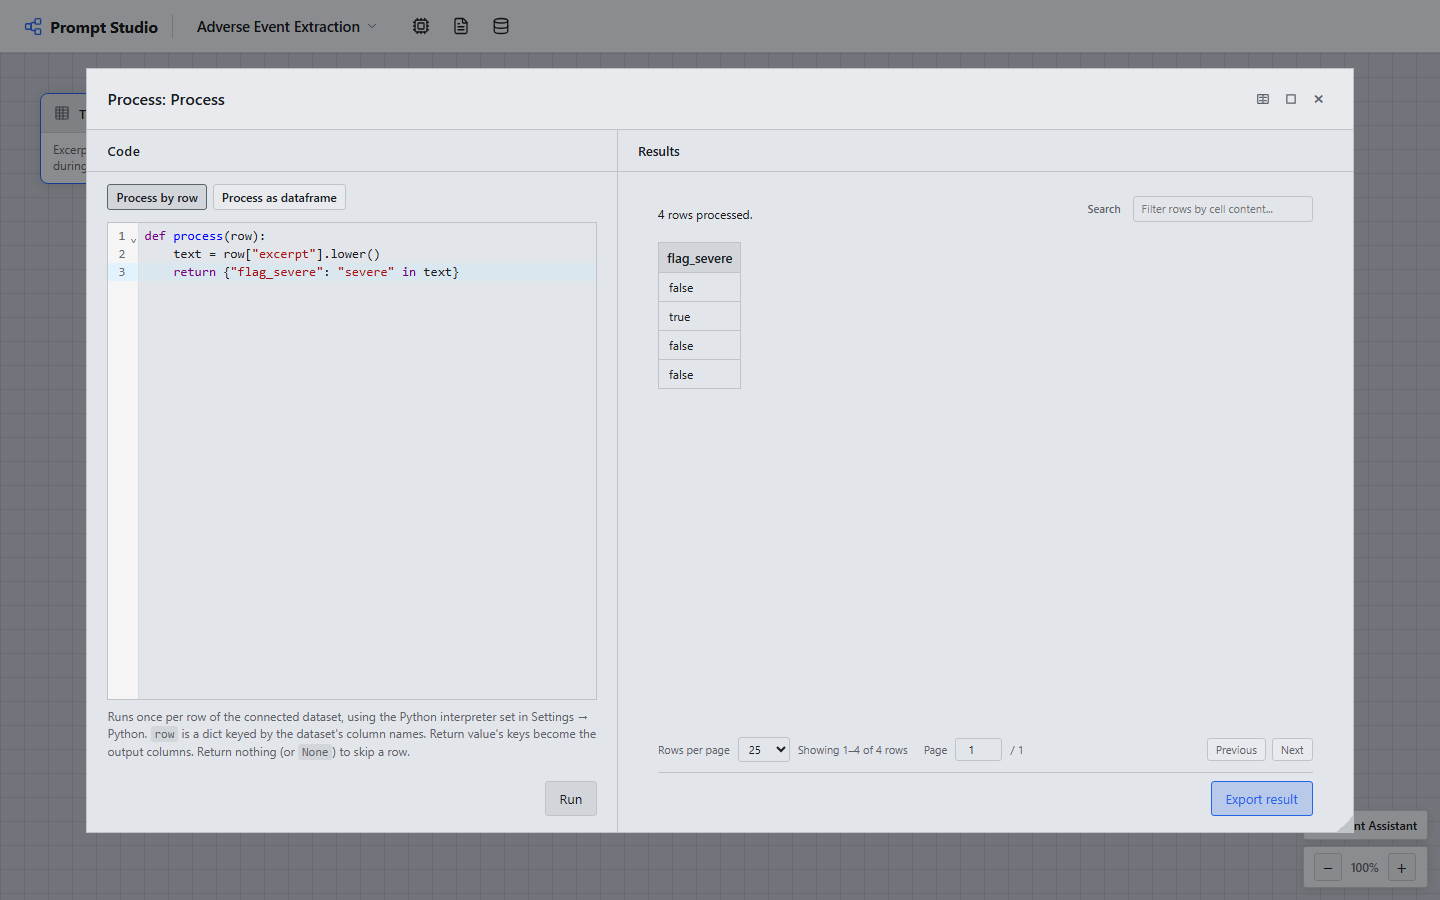
Click Run to execute it against the connected dataset and see results in the same table format as a Run node. A Process node's output can also be exported back out as a new dataset, so you can chain it into a prompt afterward, for example filtering down to just the rows worth sending to a model.
11. Ask the Agent Assistant
The Agent Assistant is the sparkle button on the canvas. Describe what you want in plain language and it can add nodes, start runs, and apply review suggestions on your behalf. Useful for setting up a canvas quickly, or for importing a dataset without hunting through the dataset modal's tabs yourself.
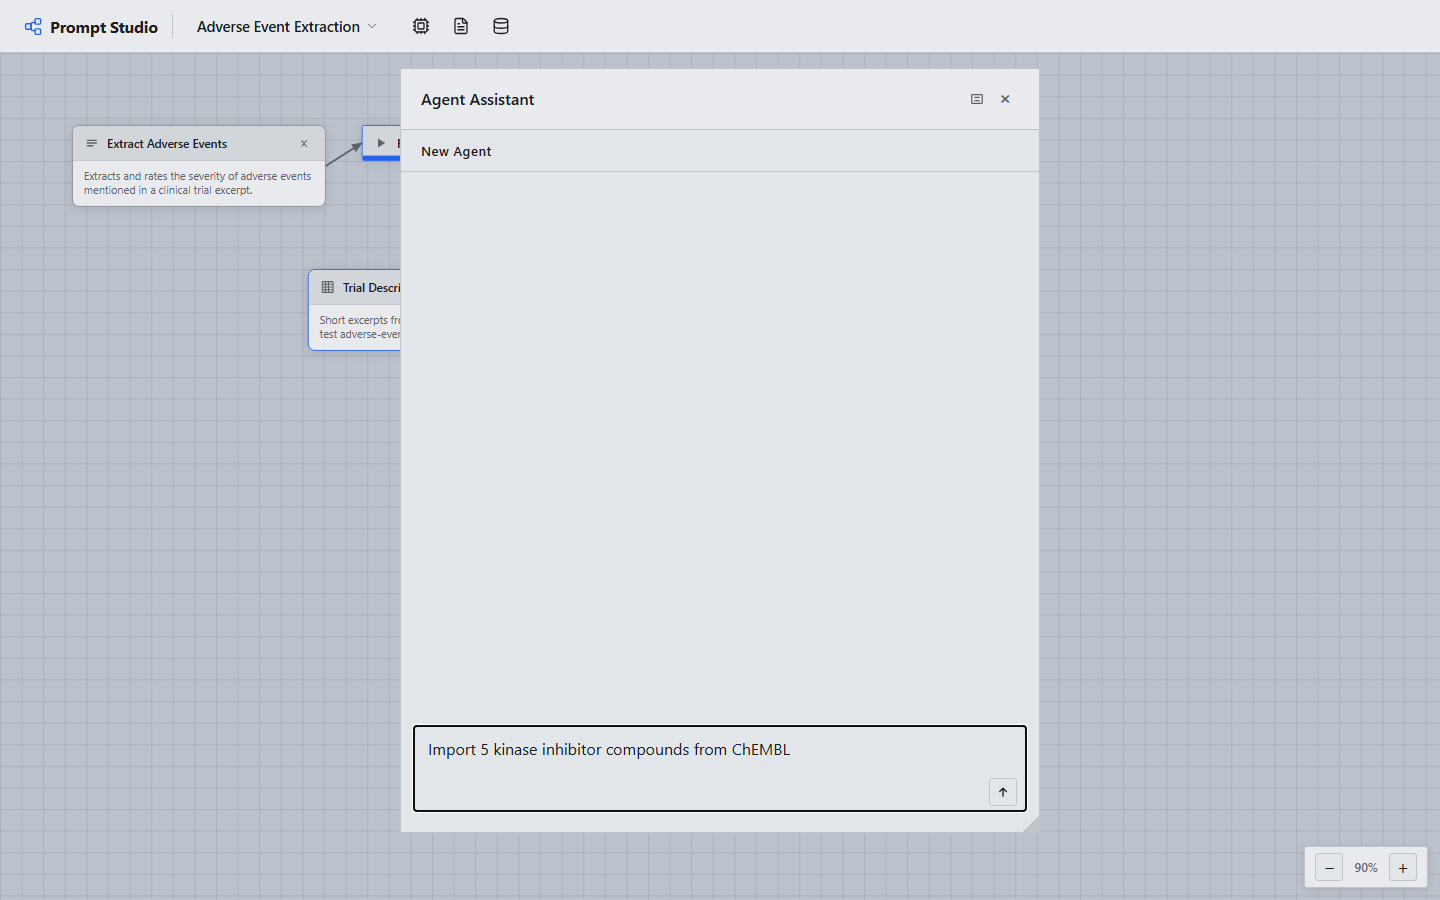
It uses whichever credential you've set as the default for the Agent Assistant in LLM settings (see Add your model).
12. Managing projects
Open the project picker from the top bar to see every project you've created.
- Duplicate makes an independent copy of a project (prompts, datasets, and run history included), so you can branch off without touching the original.
- Merge into current project copies another project's nodes onto the canvas you currently have open, useful for combining a prompt you built in one project with a dataset from another.